Google Earth can make creating radius rings on a map quick and easy. The trick is using the Show Ruler tool. When you’ve finished, you can import the rings into Google Maps where you can share them with others.
Google Earth Pro is free software that provides an easy-to-use way to make radius rings: the Show Ruler tool. With it you can draw radius rings and save them as a .kmz file you can then import into Google Maps.
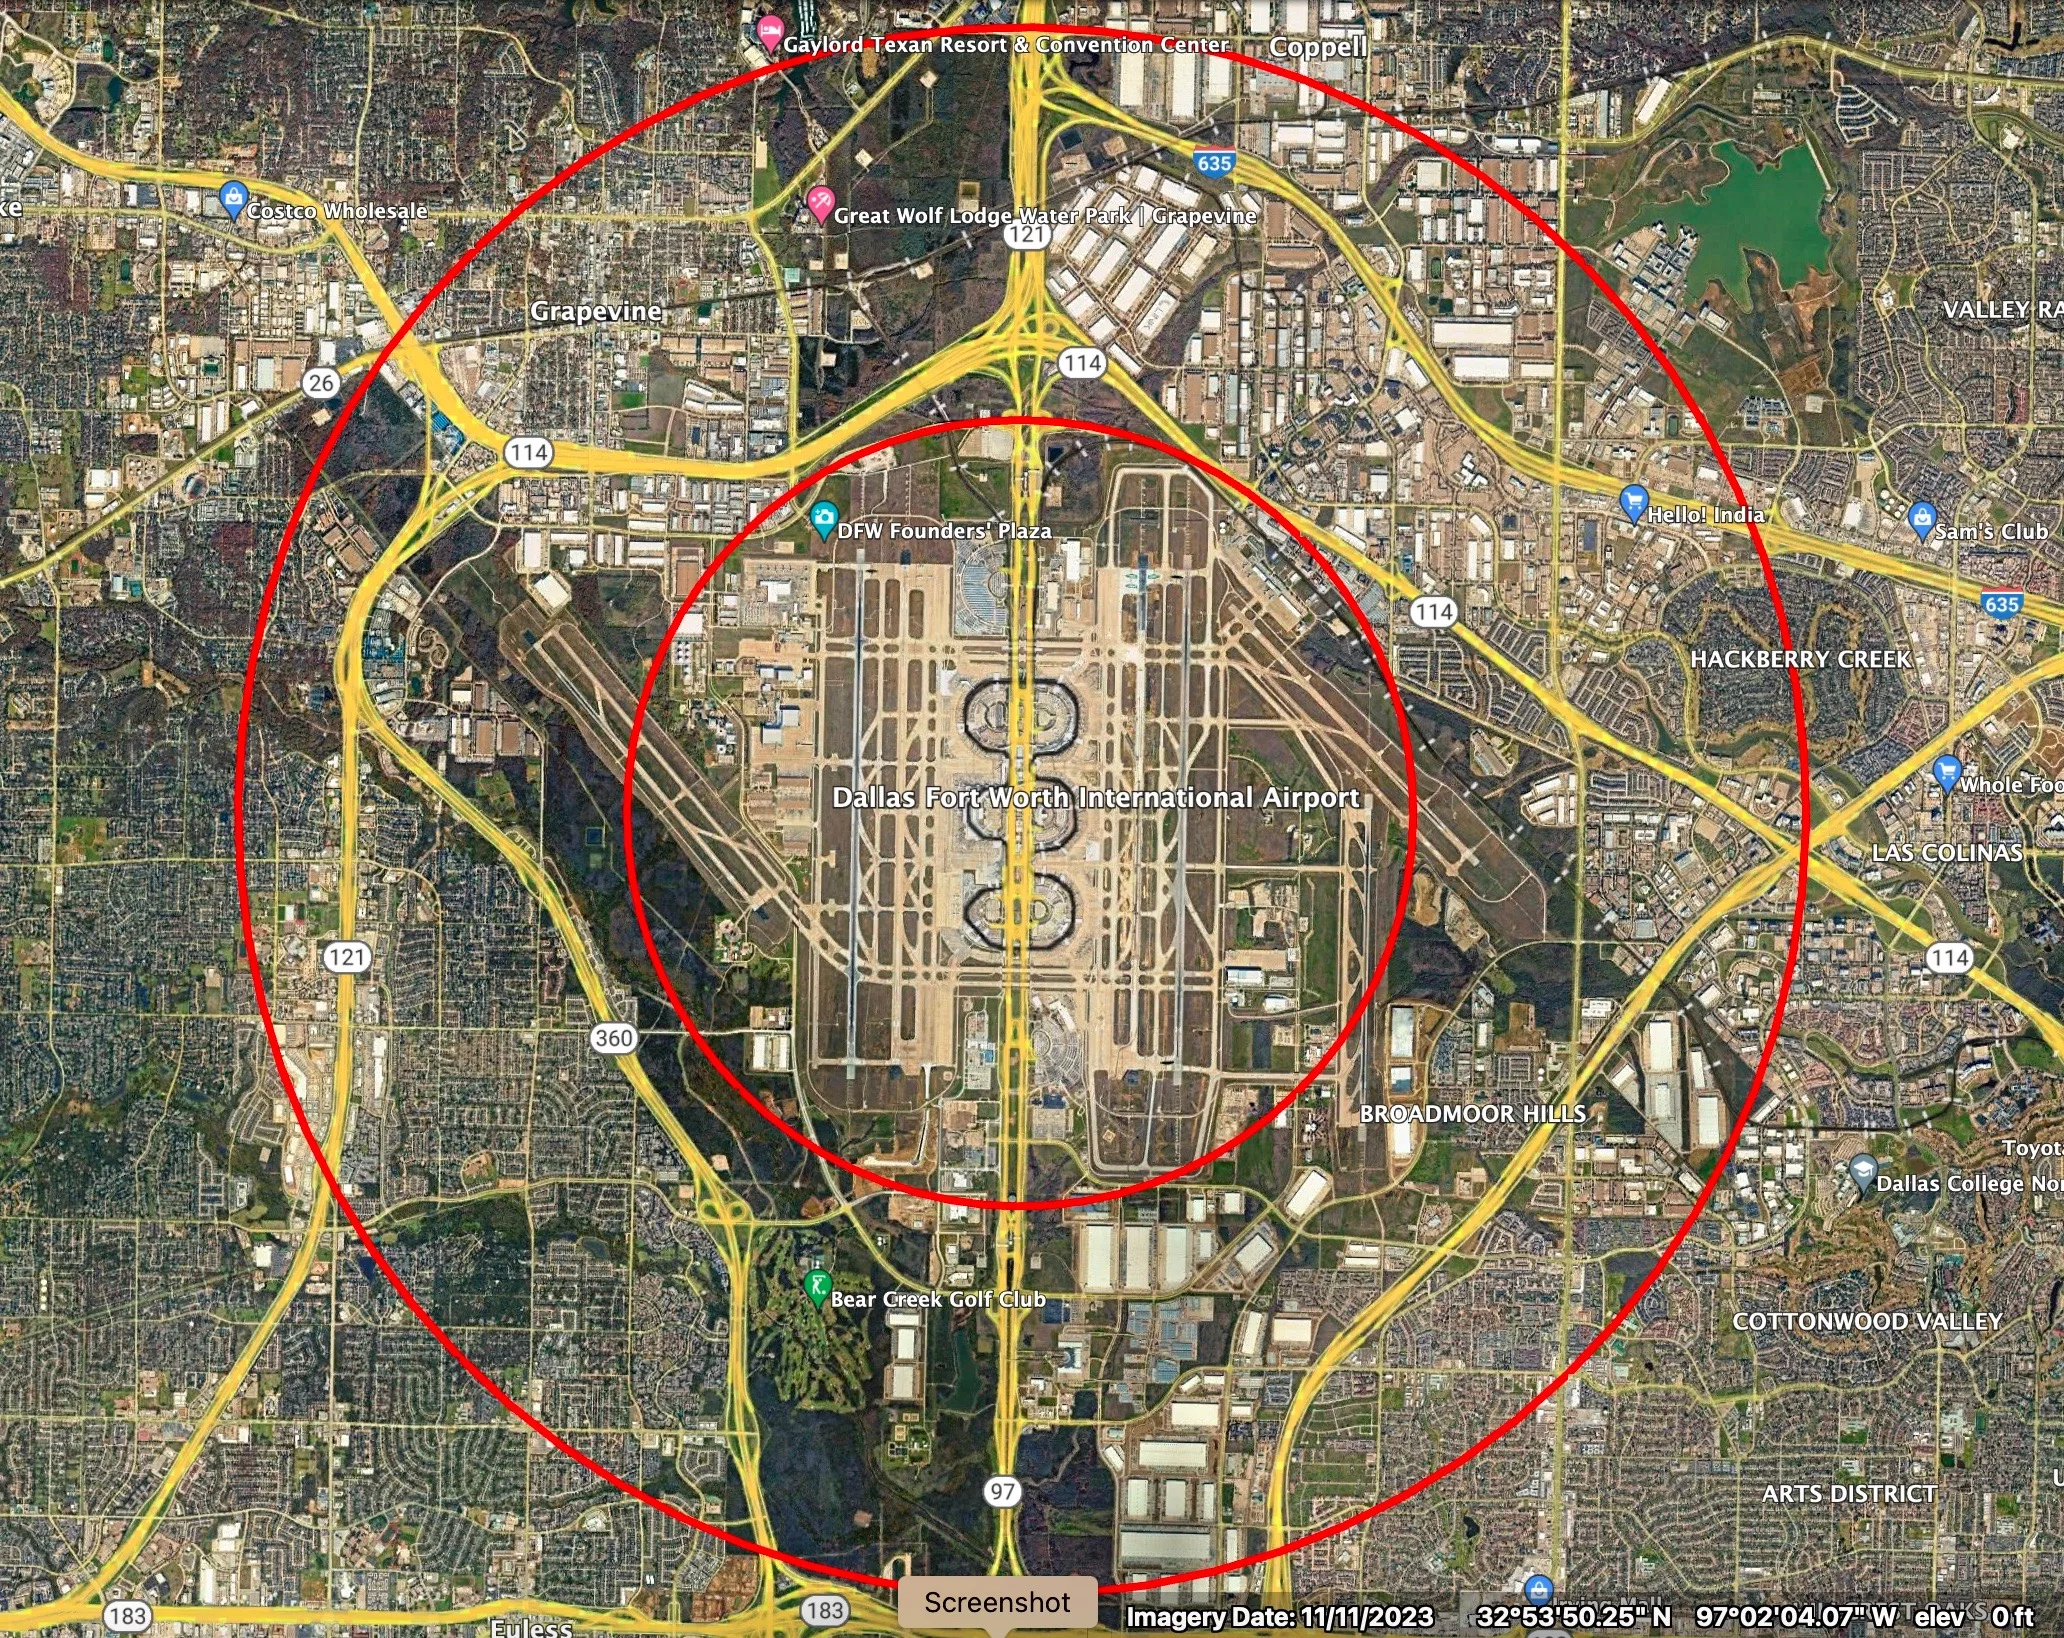
Start in Google Earth Desktop
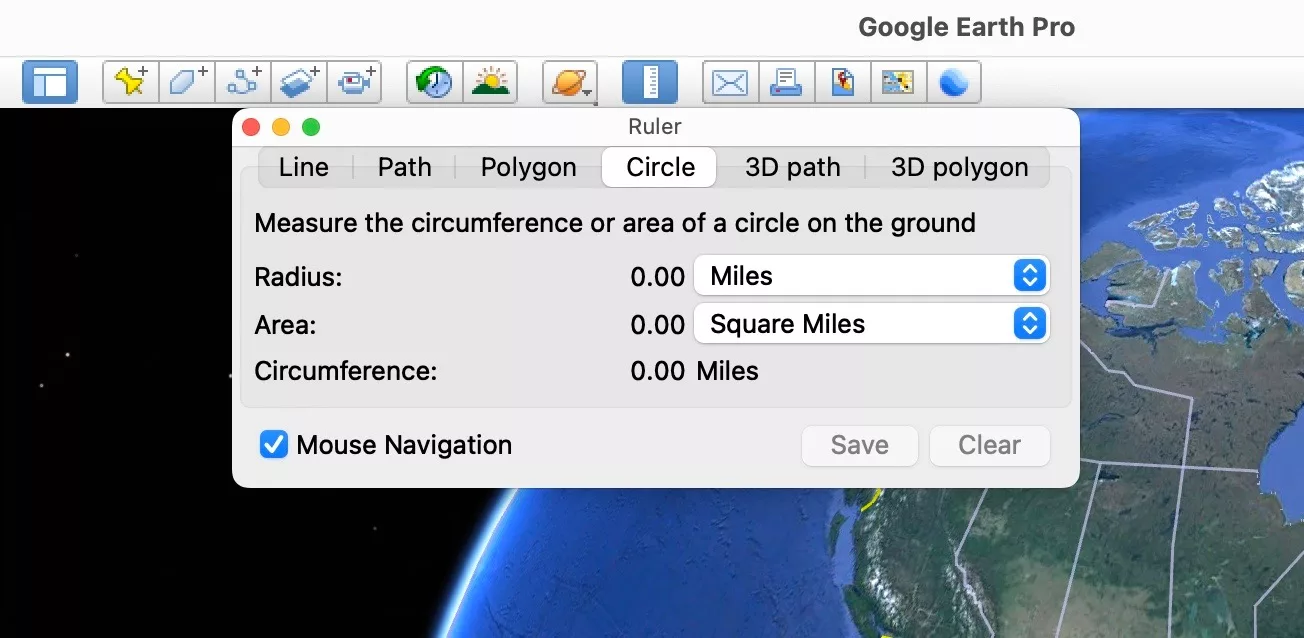
To start, click the Show Ruler icon. In the pop-up dialog box, select the Circle tab. Next, choose the units of measure for the Radius field. With the Radius set, click the Google Earth Pro cursor on the map display and release the mouse button. Now move the cursor away from the point you just clicked. Watch the Radius field read-out of radius length as you move. Simply click again when you’ve reached a desired radius interval. In the Ruler dialog box, click Save to save the radius ring.
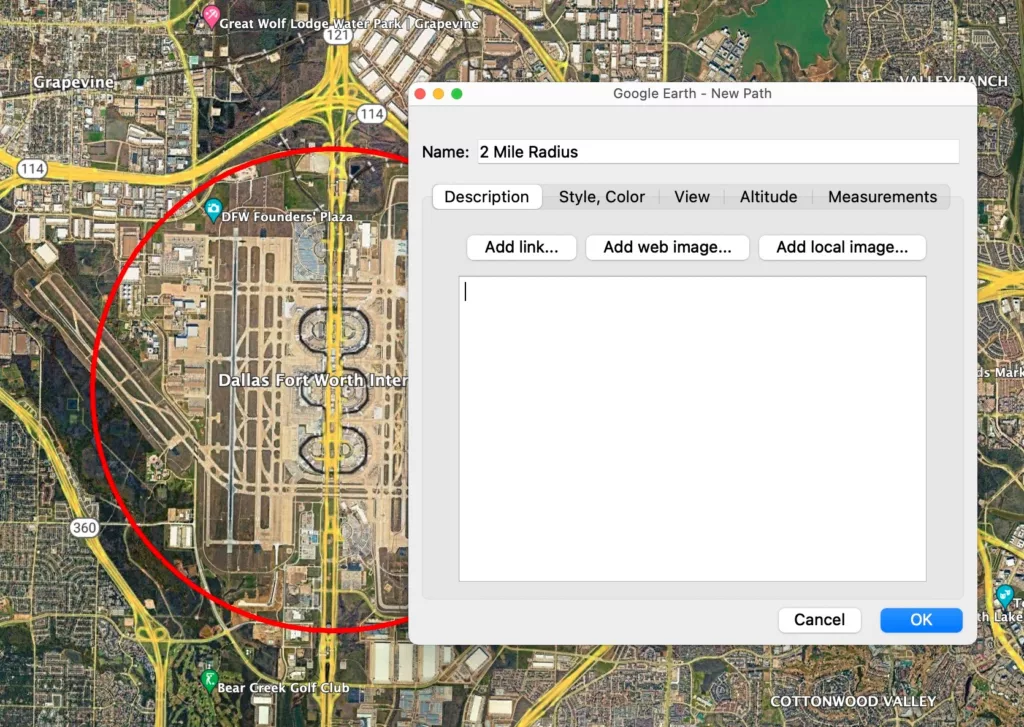
When you save your radius ring, the New Path dialog box pops up. You can ignore naming the radius ring, or, instead give it a name that will later serve as the label for that ring (if you choose to label the rings). Be sure you’ve created a project folder so you can move your saved rings to it before exporting in the next step.
Export from Google Earth
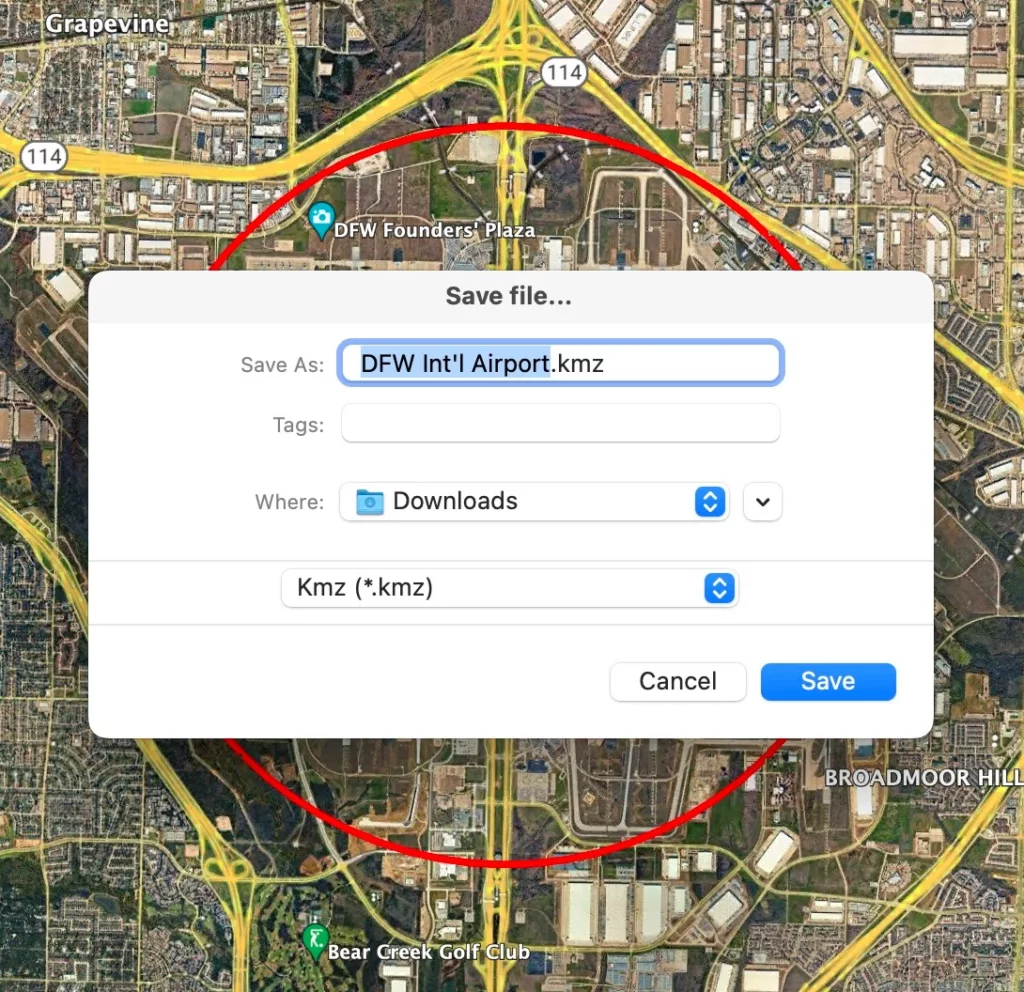
When you’ve created all of the rings you want, right-click on the name of the folder where you’ve moved saved rings. Next, choose Save Place As and save the .kmz file to a location on your computer.
Import into Google Maps
You can now import the .kmz file into Google Maps and build a custom My Maps and share it with others.
To import your .kmz file into Google Maps, log into Google’s My Maps here.
Next, click the Create A New Map button. In the pop-up dialog box, select Create. A Google map will display. In the upper-left corner, you’ll find the map dialog box displaying information on your newly created map.
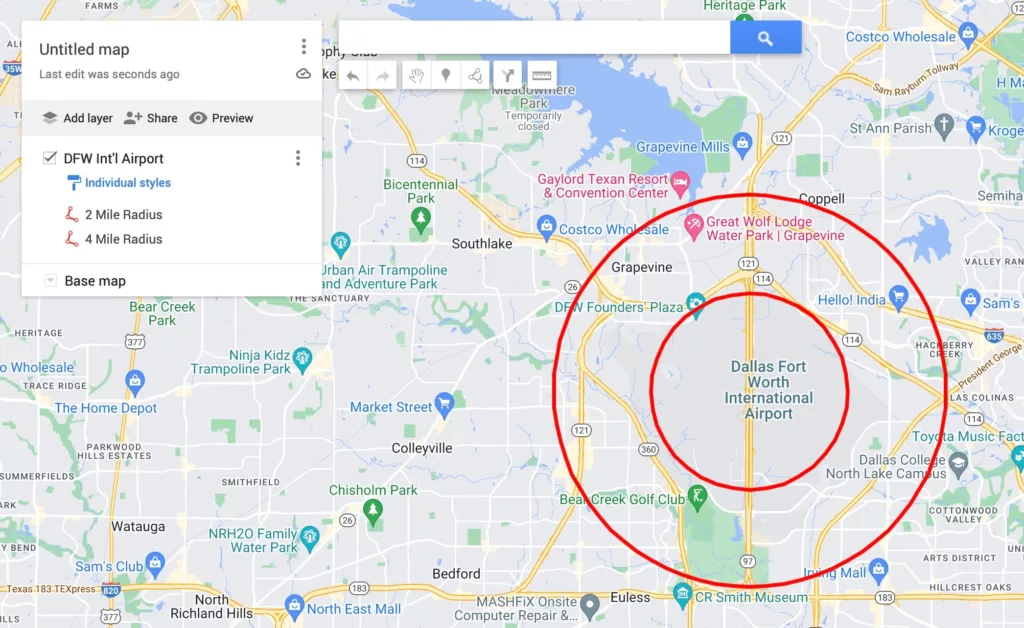
Click the Import link and select the .kml file you created previously (which will automatically center the Google map over the rings’ location).
From here, you can complete your map information in the dialog box by adding a name to the map or layer. You can add a new layer and add points-of-interest icons to customize the map. You can also export the map as a .kml or .kmz file to share with mapping software. Your export can comprise all layers (including the radius rings) and any other layers you created to display customizations like icons, hand-drawn roads, or text.
For more posts about mapping, head over to Cartagram.